linux 安装Caffe
1. 安装依赖库:
1 | sudo apt-get install libprotobuf-dev libleveldb-dev libsnappy-dev libopencv-dev libhdf5-serial-dev protobuf-compiler |
2. 安装BLAS:
1 | sudo apt-get install libatlas-base-dev |
3.安装Opencv:
下载 linux 版本 opencv 安装包,unzip解压到指定目录
在安装目录下执行下面code
1 | sudo apt-get update |

4. 安装 Matlab
5. 下载Caffe:
1 | cd path_caffe // 到指定目录 |
修改Makefile,在
1
2
3LIBRARIES += glog gflags protobuf leveldb snappy \
lmdb boost_system hdf5_hl hdf5 m \
opencv_core opencv_highgui opencv_imgproc opencv_imgcodecs
处加入后面的opencv_imgcodecs,因为opencv3.0.0把imread相关函数放到imgcodecs.lib中了(原来是imgproc.lib)
CPU model
修改Makefile.config文件:去掉CPU_ONLY:= 1的注释
GPU model
mint下安装英伟达驱动和cuda显得格外简单。我在ubuntu下折腾了n久,都以悲剧收场。
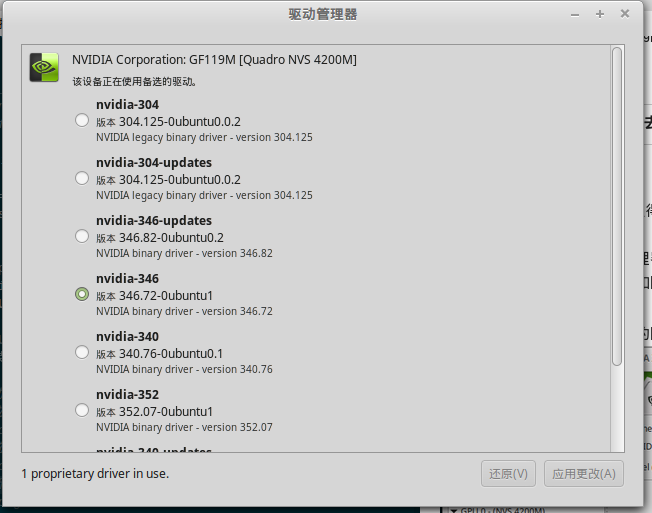
安装驱动: 打开mint的驱动管理器 直接安装即可
安装完成后 打开驱动管理器如图所示,
而且系统右下角会出现英伟达的图标,点击打开图标后显示
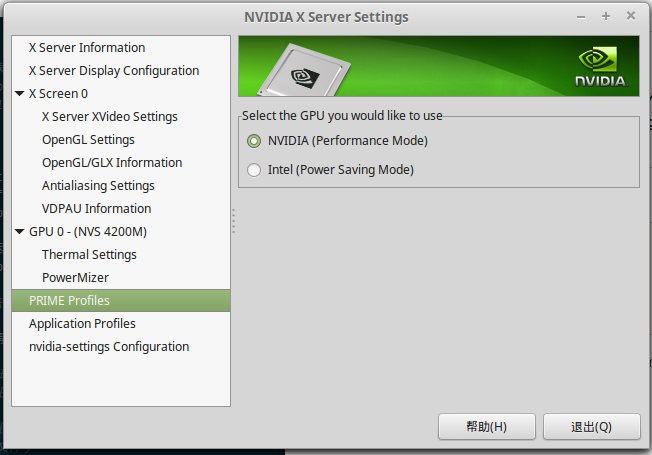
如果途中选中的是 Intel 那一项可能是因为bios显卡设置的问题,重启电脑进入bios,将显卡设置为独立显卡模式即可。
下载最新的cuda安装包(.deb文件)
sudo dpkg -i xxx.deb
sudo apt-get update
sudo apt-get insatll cuda
也可以直接用软件管理器打开.deb文件直接安装
安装完成后进入 /usr/local/cuda/samples/
编译例子 sudo make
全部编译完成后, 进入 samples/bin/x86_64/linux/release,
sudo下运行deviceQuery,如果出现下列显卡信息, 则驱动及显卡安装成功1
2
3
4
5
6
7
8
9
10
11
12
13
14
15
16
17
18
19
20
21
22
23
24
25
26
27
28
29
30
31
32
33
34
35
36
37
38
39
40 sudo ./deviceQuery
./deviceQuery Starting.
CUDA Device Query (Runtime API) version (CUDART static linking)
Detected 1 CUDA Capable device(s)
Device 0: "NVS 4200M"
CUDA Driver Version / Runtime Version 7.0 / 7.0
CUDA Capability Major/Minor version number: 2.1
Total amount of global memory: 1024 MBytes (1073414144 bytes)
( 1) Multiprocessors, ( 48) CUDA Cores/MP: 48 CUDA Cores
GPU Max Clock rate: 1620 MHz (1.62 GHz)
Memory Clock rate: 800 Mhz
Memory Bus Width: 64-bit
L2 Cache Size: 65536 bytes
Maximum Texture Dimension Size (x,y,z) 1D=(65536), 2D=(65536, 65535), 3D=(2048, 2048, 2048)
Maximum Layered 1D Texture Size, (num) layers 1D=(16384), 2048 layers
Maximum Layered 2D Texture Size, (num) layers 2D=(16384, 16384), 2048 layers
Total amount of constant memory: 65536 bytes
Total amount of shared memory per block: 49152 bytes
Total number of registers available per block: 32768
Warp size: 32
Maximum number of threads per multiprocessor: 1536
Maximum number of threads per block: 1024
Max dimension size of a thread block (x,y,z): (1024, 1024, 64)
Max dimension size of a grid size (x,y,z): (65535, 65535, 65535)
Maximum memory pitch: 2147483647 bytes
Texture alignment: 512 bytes
Concurrent copy and kernel execution: Yes with 1 copy engine(s)
Run time limit on kernels: Yes
Integrated GPU sharing Host Memory: No
Support host page-locked memory mapping: Yes
Alignment requirement for Surfaces: Yes
Device has ECC support: Disabled
Device supports Unified Addressing (UVA): Yes
Device PCI Domain ID / Bus ID / location ID: 0 / 1 / 0
Compute Mode:
< Default (multiple host threads can use ::cudaSetDevice() with device simultaneously) >
deviceQuery, CUDA Driver = CUDART, CUDA Driver Version = 7.0, CUDA Runtime Version = 7.0, NumDevs = 1, Device0 = NVS 4200M
Result = PASS
效果如下图所示: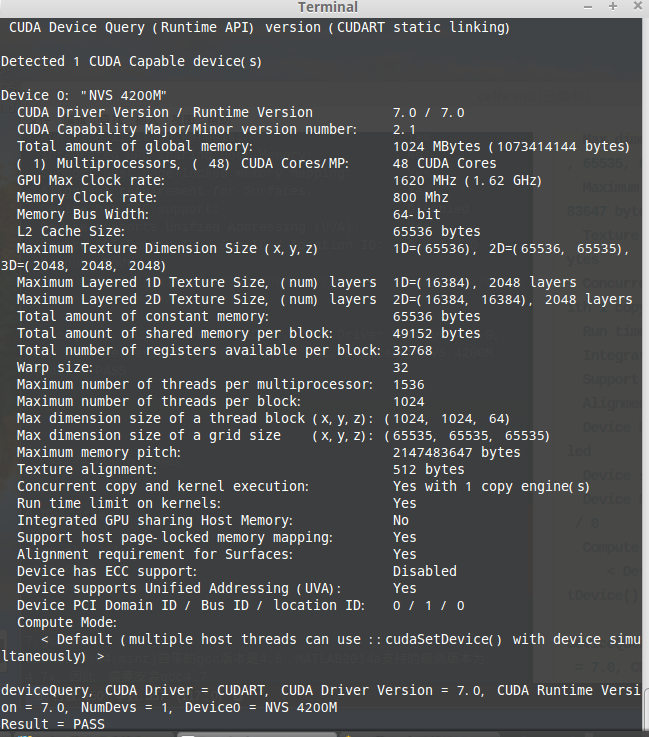
然后查看CUDA Capability Major/Minor version number这一项,为2.1.
在Makefile.config文件中,修改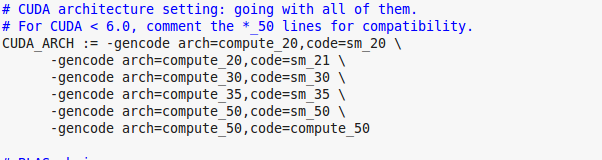
CuDNN model
安装CuDNN
下载CuDNN库文件:cudnn-7.0-linux-x64-v3.0-rc.tgz
tar -xzvf cudnn-7.0-linux-x64-v3.0-rc.tgz
cd cuda/lib64
sudo cp lib* /usr/local/cuda/lib64/
cd ..
cd include
sudo cp cudnn.h /usr/local/cuda/include/
在~/caffe/Makefile.config中,将# USE_CUDNN := 1的注释去掉,
即:USE_CUDNN := 1,并重新编译
6. 编译Caffe:
之前make过的话,要make clean命令清除之前的结果,然后重新执行下面的命令即可
1
2
3
4make clean
make all -j4
make test -j4
make runtest -j4
出现 error,具体信息如下:1
2.build_release/tools/caffe: error while loading shared libraries: libcudart.so.7.0: cannot open shared object file: No such file or directory
make: 3* [runtest] Error 127
解决办法
sudo ldconfig /usr/local/cuda-7.0/lib64
error
SolverTest/3.TestInitTrainTestNets
F0910 11:19:15.516458 4395 cudnn_softmax_layer.cpp:19] Check failed: status == CUDNN_STATUS_SUCCESS (6 vs. 0) CUDNN_STATUS_ARCH_MISMATCH
Check failure stack trace:
因为笔记本上的NVS4200M的CUDA Capability是2.1,而官方的cudnn加速是不支持3.0以下的版本的,因此只能在Makefile.config中注释掉USE_CUDNN这行,最后终于编译成功。
执行data下的的相关文件下载数据
1
2
3sudo sh data/mnist/get_mnist.sh
sudo sh data/cifar10/get_cifar10.sh
sudo sh data/ilsvrc12/get_ilsvrc_aux.sh
运行Mnist例子
1
2sudo ./examples/mnist/create_mnist.sh
sudo ./examples/mnist/train_lenet.sh
7. gcc降级
ubuntu14.04(mint)自带的gcc版本是4.8,MATLAB2014a支持的最高版本为4.7x。因此,需要安装gcc4.7,1
2
3
4
5
6
7
8
9sudo apt-get install gcc-4.7 g++-4.7 g++-4.7-multilib gcc-4.7-multilib
sudo update-alternatives --install /usr/bin/g++ g++ /usr/bin/g++-4.7 100
sudo update-alternatives --install /usr/bin/g++ g++ /usr/bin/g++-4.8 50
sudo update-alternatives --install /usr/bin/gcc gcc /usr/bin/gcc-4.7 100
sudo update-alternatives --install /usr/bin/gcc gcc /usr/bin/gcc-4.8 50
sudo update-alternatives --install /usr/bin/cpp cpp-bin /usr/bin/cpp-4.7 100
sudo update-alternatives --install /usr/bin/cpp cpp-bin /usr/bin/cpp-4.8 50
// 验证gcc默认版本:
gcc -v
8. 编译matlab借口
修改Makefile.config文件,配置matlab安装路径:
MATLAB_DIR :=/home/sun/app/matlab/R2015a
sudo make matcaffe
参考链接:
Ubuntu14.04 安装Caffe(仅CPU)